
Frequently Asked Questions & Problems
Problem 1. Pixhawk failed to connect to the computer.
Problem 2.2 Both Mag1 & Mag2 work, but never get 100% completed.
Problem 3. Failing to calibrate radio.


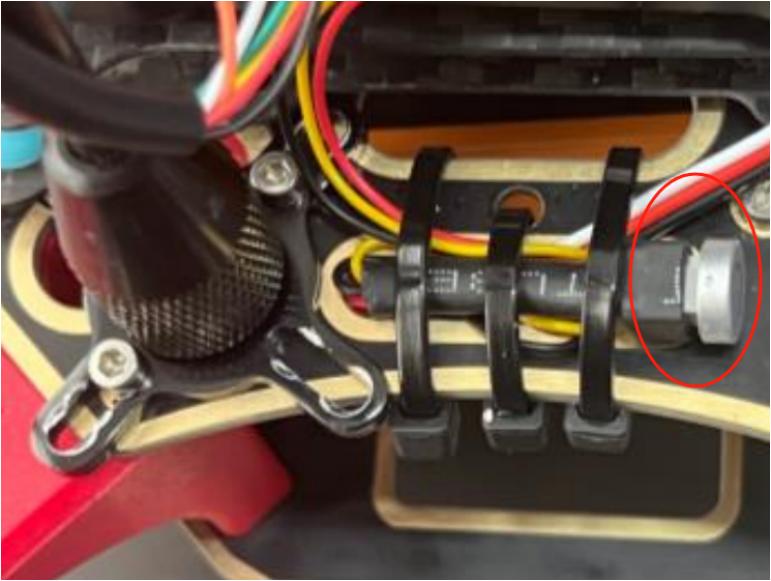
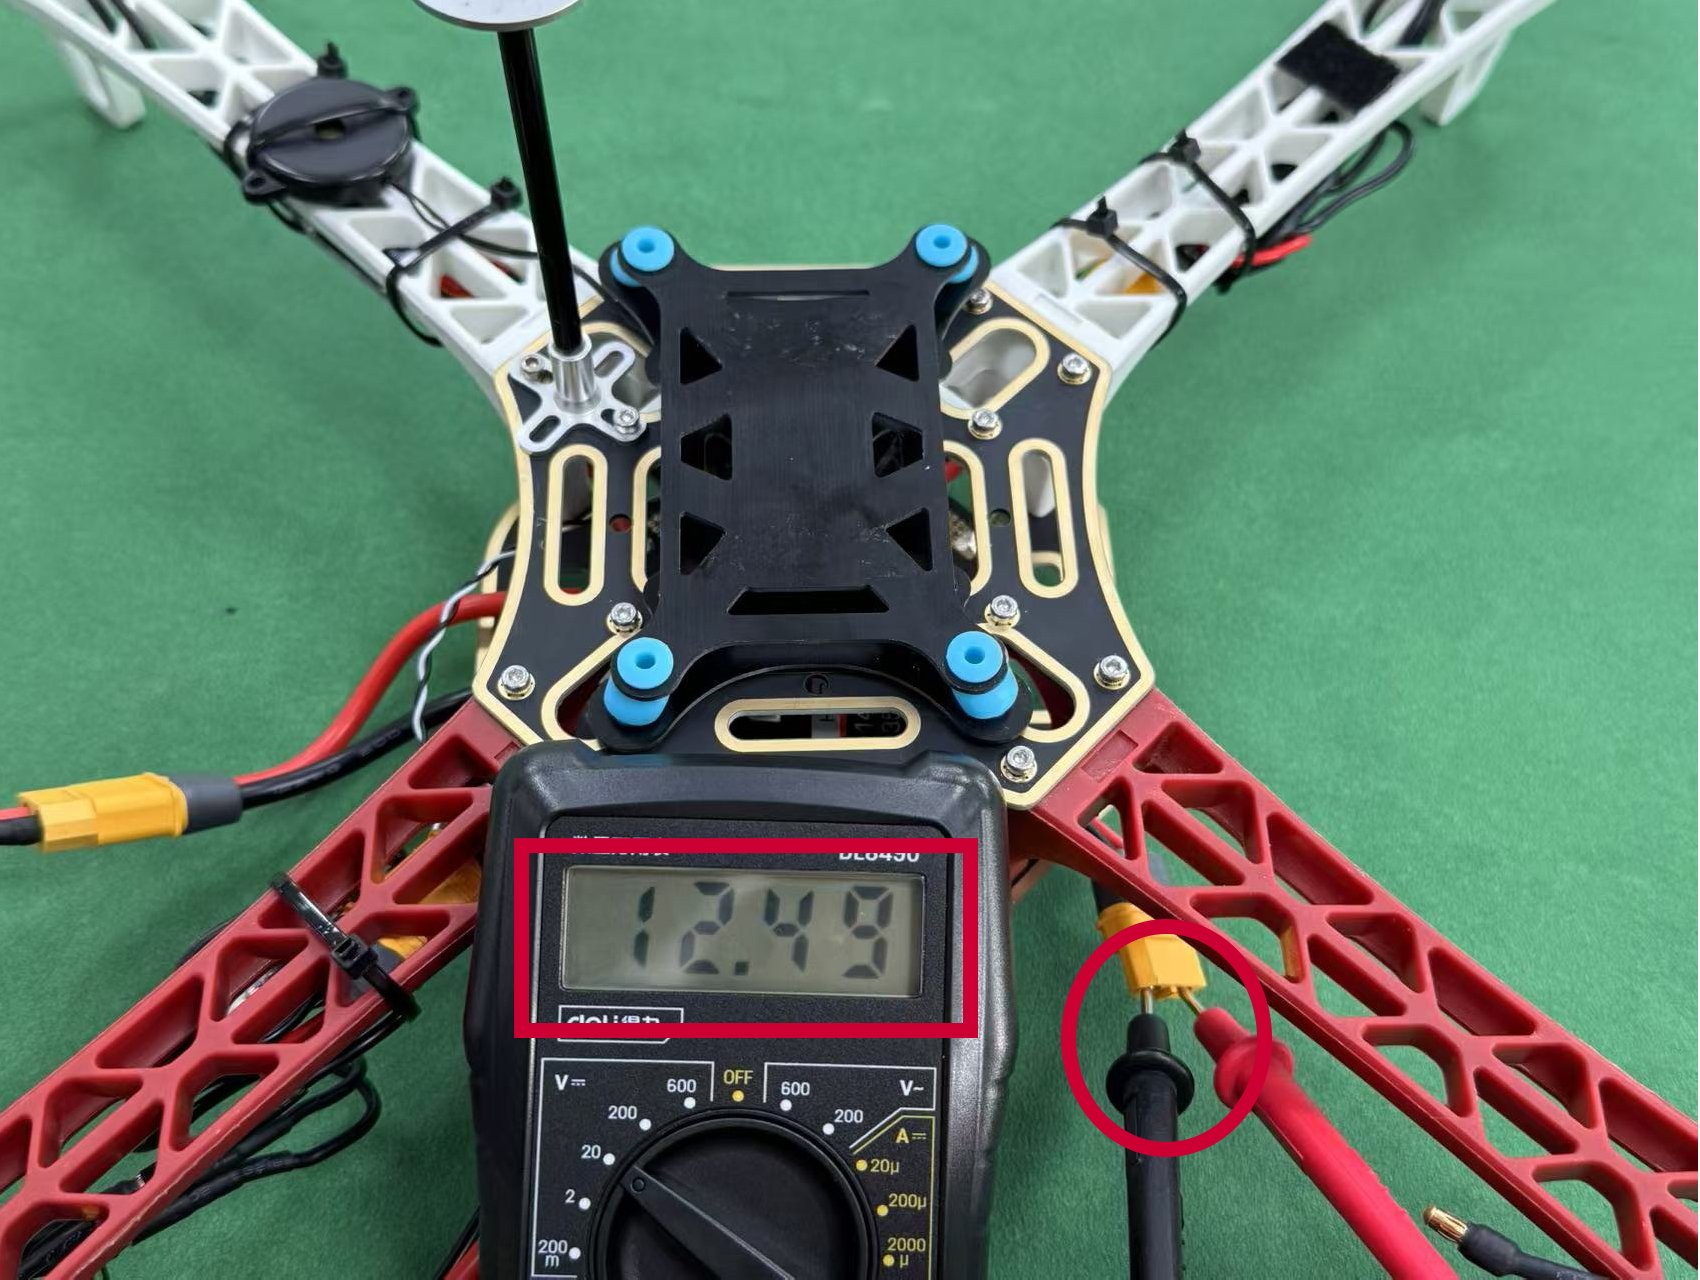
Problem 4. How the power module is connected?

Problem 5. All 4 motors do not rotate when using test motor in Mission Planner


-
-
If motors spin, then it's a software problem.
This problem can be ignored, as long as all other steps of calibration are OK.
It is caused by a software issue with the Mission Planner version or the Pixhawk firmware. And it does not affect the use of the Pixhawk.
You need to use ESC calibration to check the direction of rotation of each motor.


Problem 6. One motor does not rotate when using test motor in Mission Planner (if all motors don’t rotate, please refer to Problem 5)
Problem 7. Motors rotate with different speeds
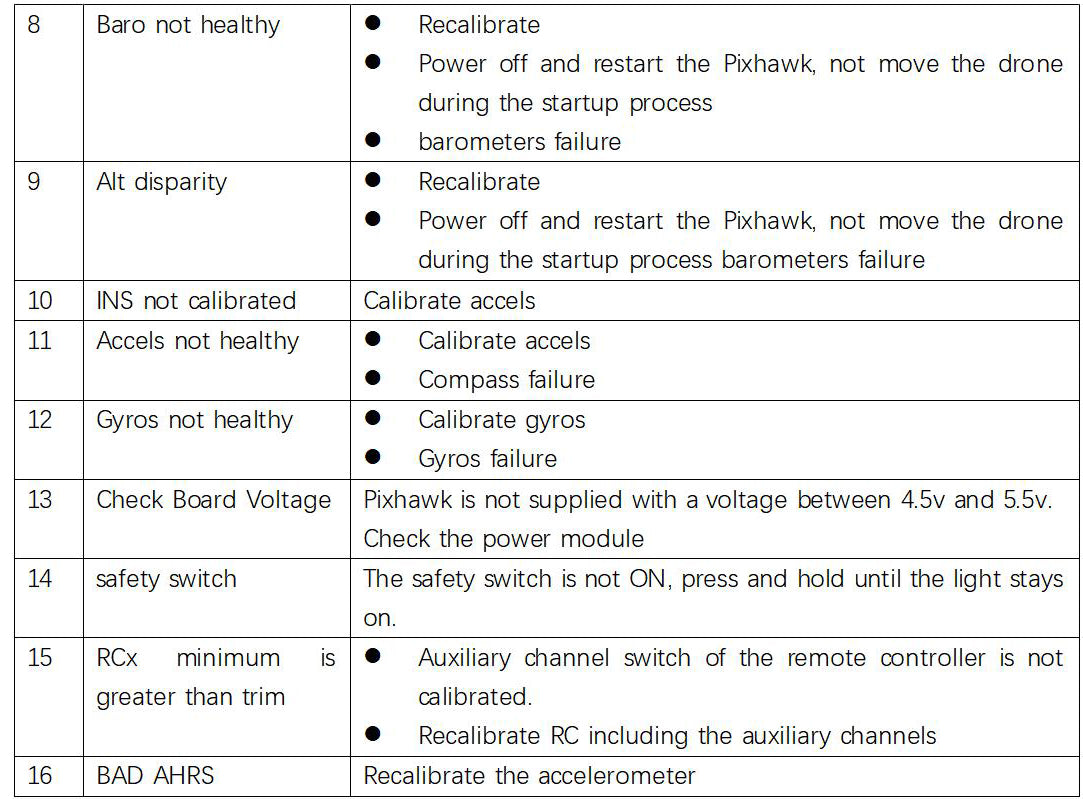
Problem 8. Drones can't arm

Problem 9. When the drone takes off, it always falls to one side.
-
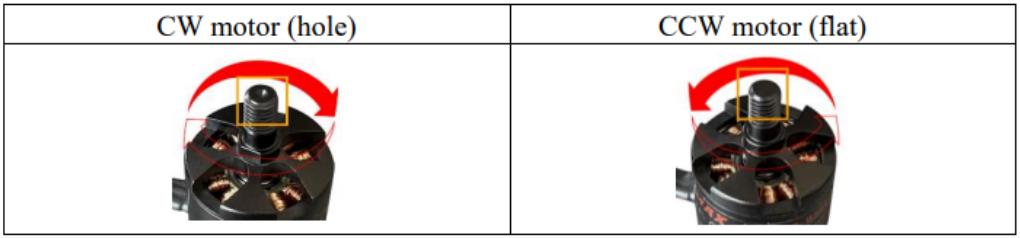
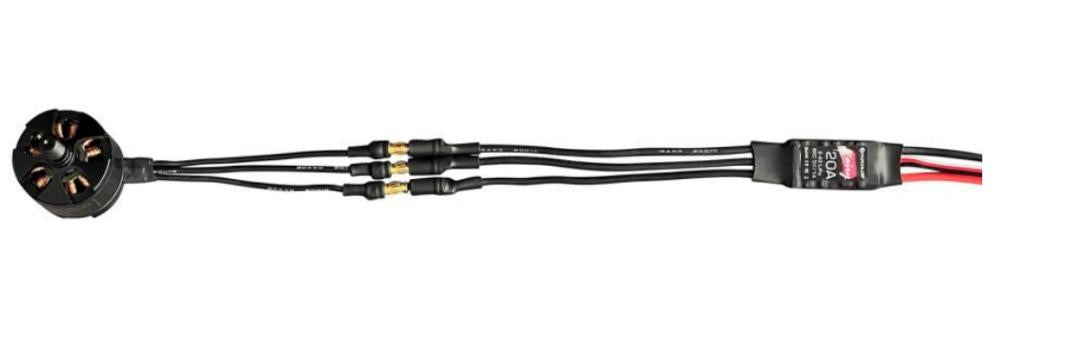
Check the rotation direction of each motor according to the pictures below. If you need to reverse the rotation, exchange any 2 of the 3 wires.
-

-
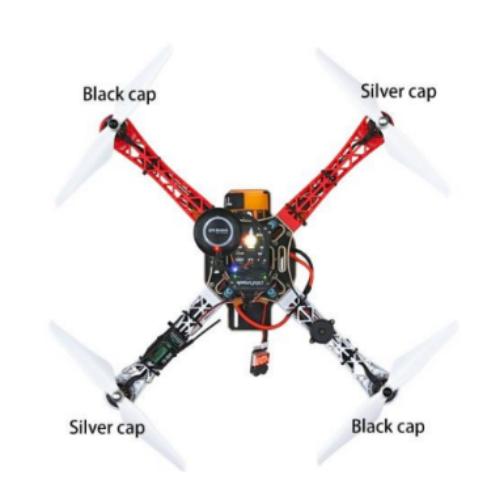
b. Check propeller
#1 #2 motors install silver-capped propellers, and #3 #4 motors install black-capped propellers


-
c. ESC calibration
Click to see how to calibrate ESC
New drones must have their ESCs calibrated. It will also need to be calibrated if the motors, ESCs or RCs are replaced.

