
Z80 RC Conversion Quick Start Guide
Warning
Part 1 Recommended Parts List
-

This is a general recommendation and you can adjust it to your needs.

Part 2 Converse Wing


2.2 Cut the room forservo and ESC


2.3 Mount servo and motor


Part 3 Converse Fuselage


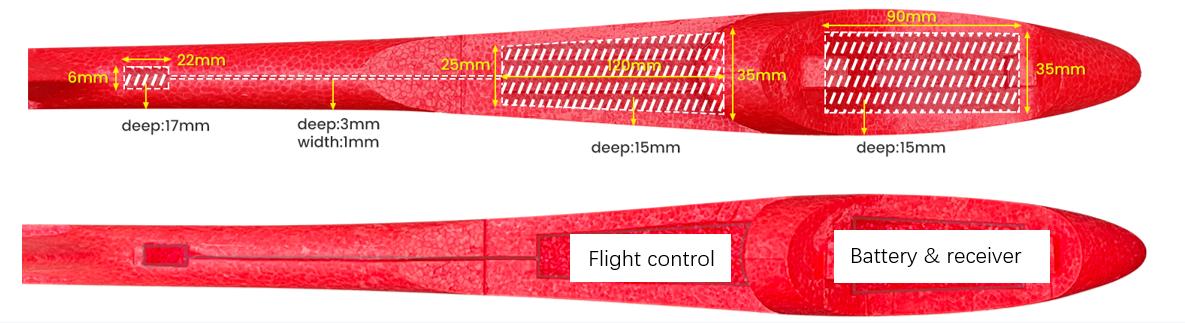


Part 5 Converse Canopy

-

Because the battery and receiver are different sizes, you should cut a proper space.

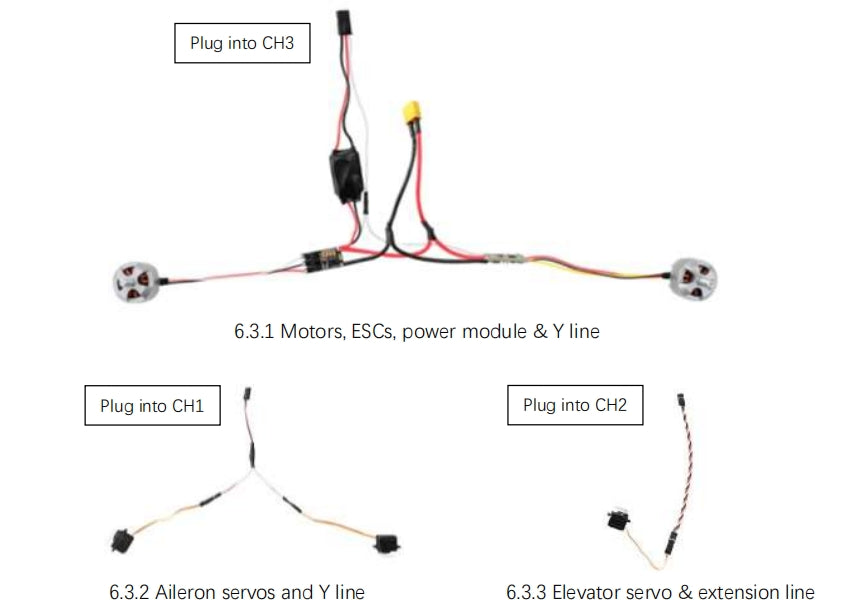
Part 6 Connecting Circuits

-

If in 2.3 you follow our advice of mounting the CW motor on the right side and the CCW motor on the left side. You can refer to this picture to solder.
But if you want to change the motor rotation direction, you just exchange any of the 2 wires.

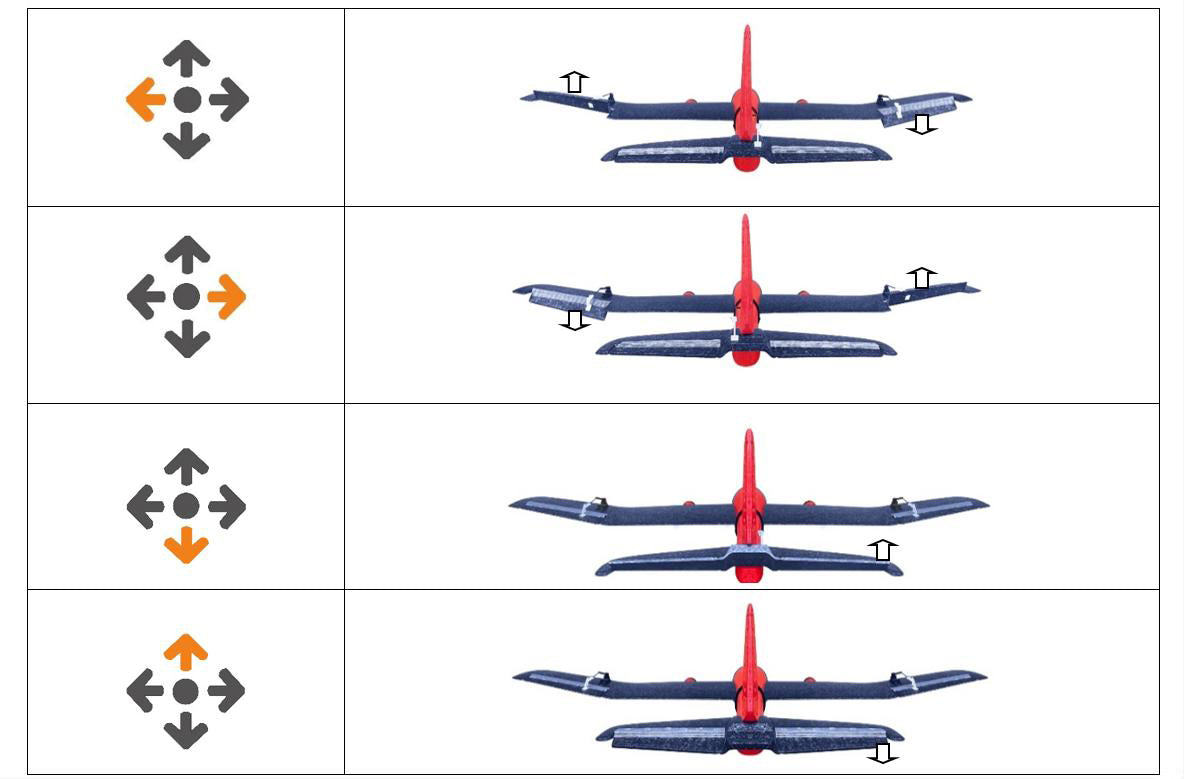
Part 7 Check & Calibrate

-

-

-

Secure the front part the quick release structure by hot melt glue. Be sure to wait for the glue to fully set before proceeding to the back.
The lines on the surface of should be held in place with tape.


