F450 Assembly & Calibration Quick Start Book
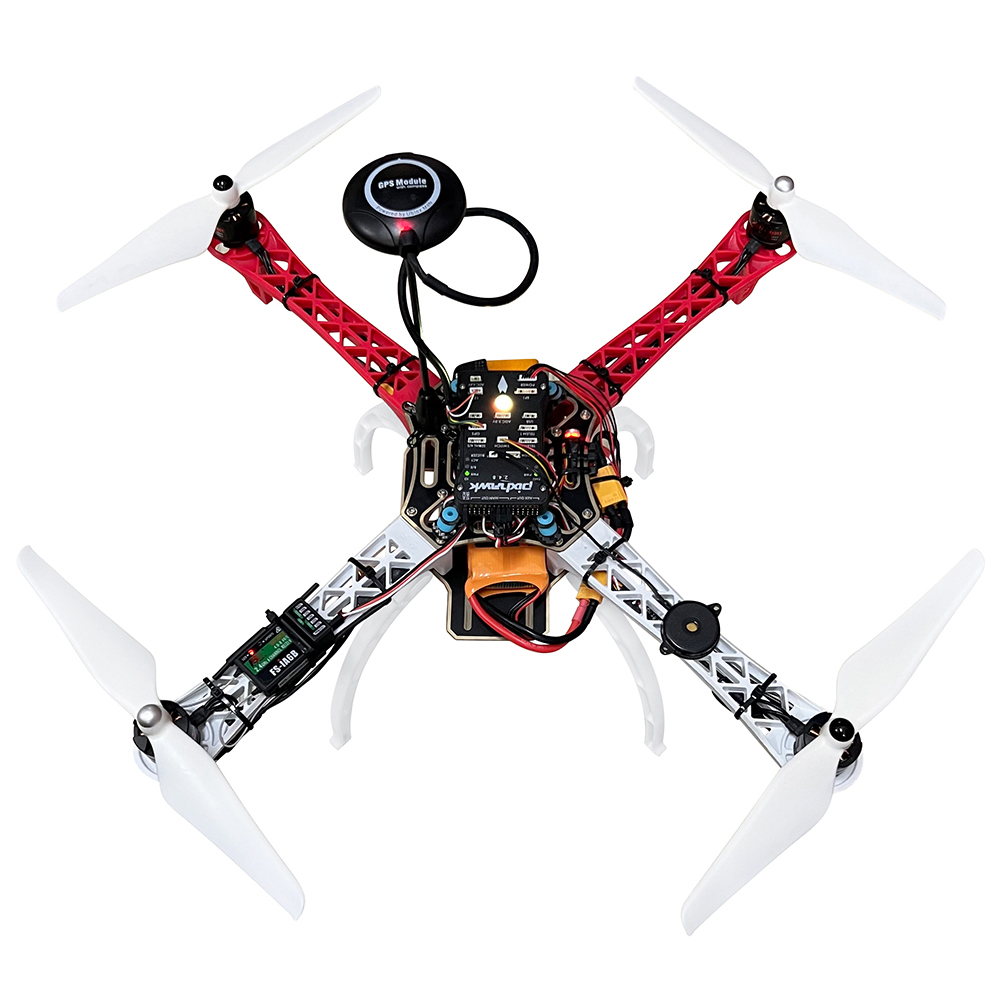
-
Part 1 Overview
-
1. Specifications and part list of basic power kit
Wheelbase: 450mm
Total weight: 1.1 kg
Max take-off weight: approx. 1.8 kg
-
Cautions:
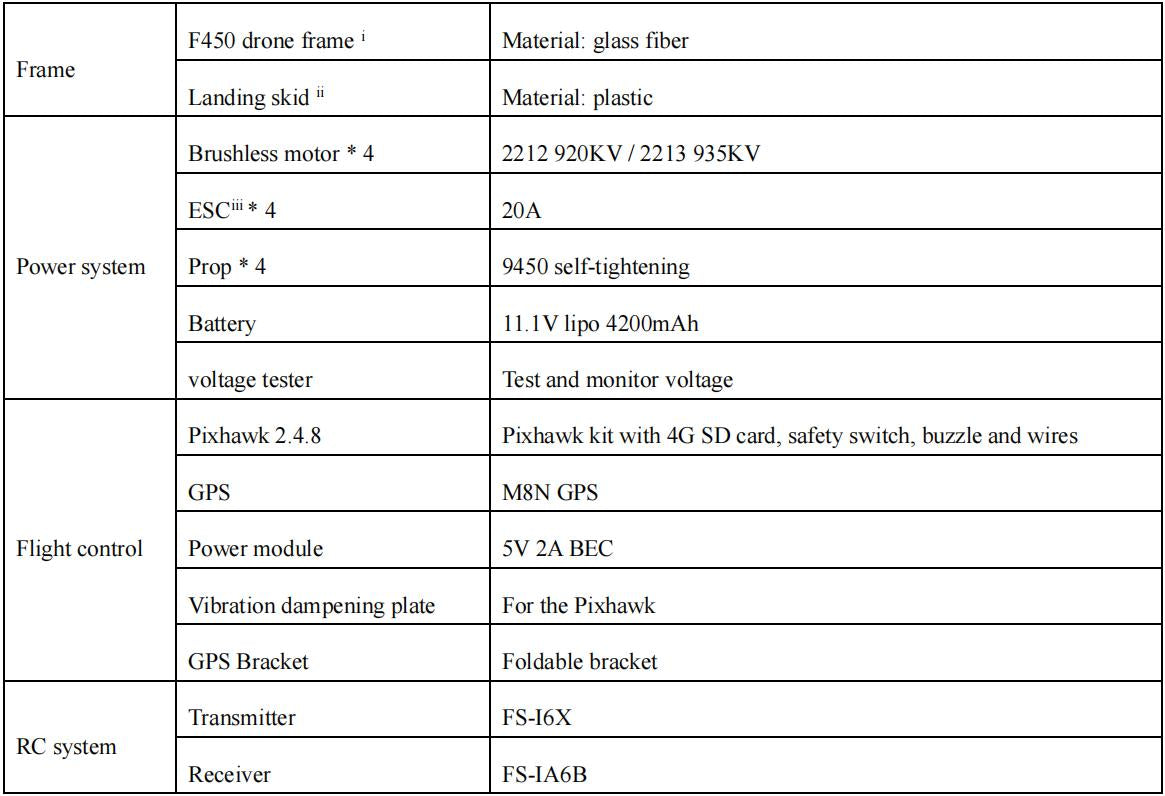
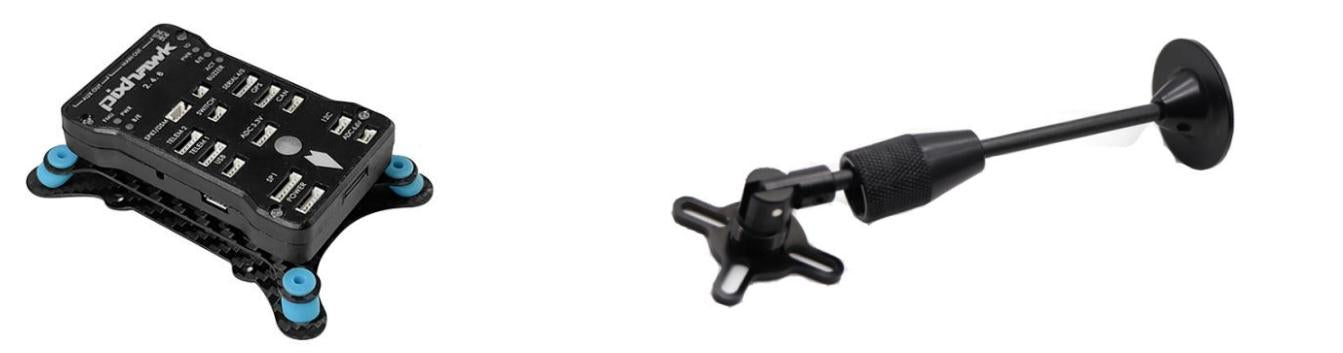
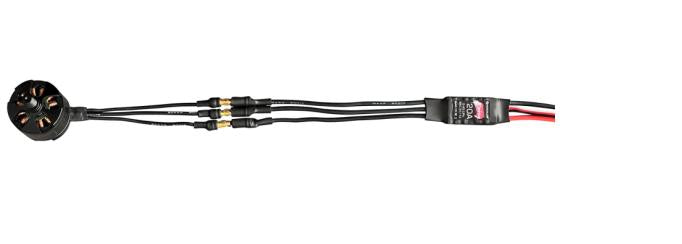
Based on your order, different kits contain different parts.
-
Remarks:
i. The F450 frame are available in pre- soldered and standard versions. If choose pre- soldered version, you only need to connect the XT60 plugs.
ii. They are no needed to install if no equipment (eg. camera or gimbal) is being carried.
iii. Because of the different versions, some ESCs don't have the BEC function, which does not affect use.
-
2. Other parts
Pair text with an image to focus on your chosen product, collection, or blog post. Add details on availability, style, or even provide a review.
-
3. Wiring diagram
-
-
Part 2 Install the Frame
-
1. Completion chart
-
-
- Red arms at the front and white arms at the back.
- The Pixhawk is installed on the top, the battery in the middle, and the equipment at the bottom (if you have).
- If'you are not carrying any other equipment, there is no need to install the landing skid.
- CCW motors are used in positions of①and ②, CW motors in③ and ④.
-
2. Distinguish between CCW and CW motors
-
-
3. Connect motor with ESC
Randomly connect the 3 wires, if you need to reverse the direction of rotation, exchange any 2 of the 3 wires.
-
NOTE:
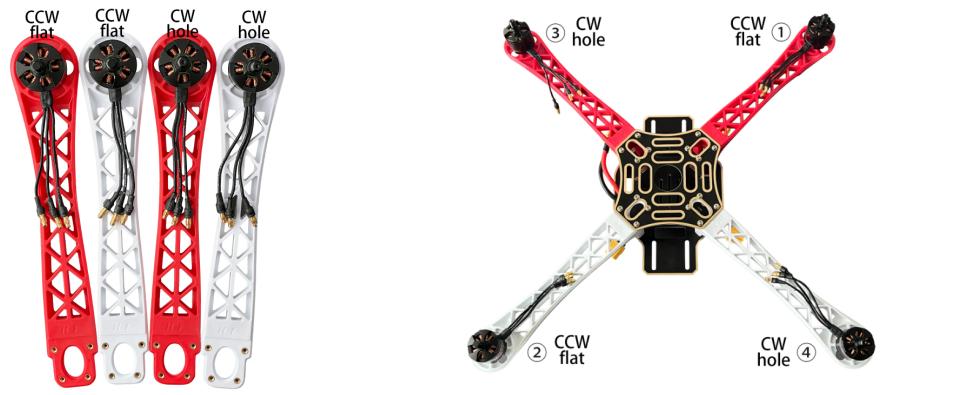
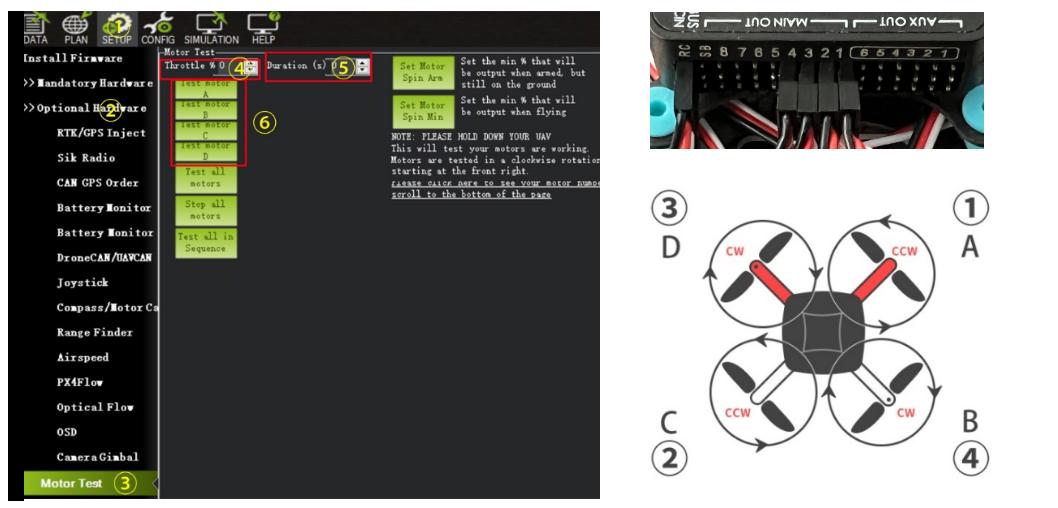
In 4.4 we will perform motor test; We need to check motors rotate direction at that time.
-
4. Install the Pixhawk
-
-
-
5. Fix the parts and organize the wires
-
-
Part 3 Setup the RC System (for FS-i6X)
-
1. Reverse the Channel 2
Steps: Long press OK - Functions setup - Reverse - Select Ch 2 press OK - Long press CANCEL to save and exit
-
-
2. Turn on PPM mode
Steps: Long press OK - System setup - RX Setup - Output mode - Output PPM - Long press CANCEL to save and exit
-
-
3. Turn on Aux switches
Steps: Long press OK - System setup - Aux switches – SwA: ON, SwB: ON, SwC: ON, SwD: ON, Ch: 8 - Long press CANCEL to save and exit
-
-
4. Set Aux. channels
Steps: Long press OK - Functions setup - Aux. channels - CH5: SwC, CH7: SwA, other CH: None - Long press CANCEL to save and exit
-
-
5. Set Ch 3 end point to 120%
Steps: Long press OK - Functions setup – End point - Channel 3 - Take throttle at minimum - Chang 100% to 120% - Long press CANCEL to save and exit
-
-
6. Set Failsafe
Path: Long press OK - System setup - RX Setup - Failsafe - Channel 3 ON – Take throttle at minimum - Long press CANCEL to save and exit
-
-
7. Set Ch 3 end point to 100%
Steps: Long press OK - Functions setup - End point - Channel 3 - OK - Take throttle at minimum - Chang 120% to 100% - Long press CANCEL to save and exit
-
-
Note:
If you are using other transmitter, the setup process may be different.
In above steps 5 to 7, we are setting up Failsafe for signal loss.
-
Part 4 Calibrate and Setup the Pixhawk
-
Pixhawk 2.4.8 requires Mission Planner to calibrate and setup, QGroundControl is not recommended.
Connect Pixhawk with computer to calibrate and battery are not required if not specified.
1. Install Mission Planner
Go to its official website https://ardupilot.org/planner to download and install it on your computer.
2. Connect Pixhawk with computer by a micro USB data cable
-
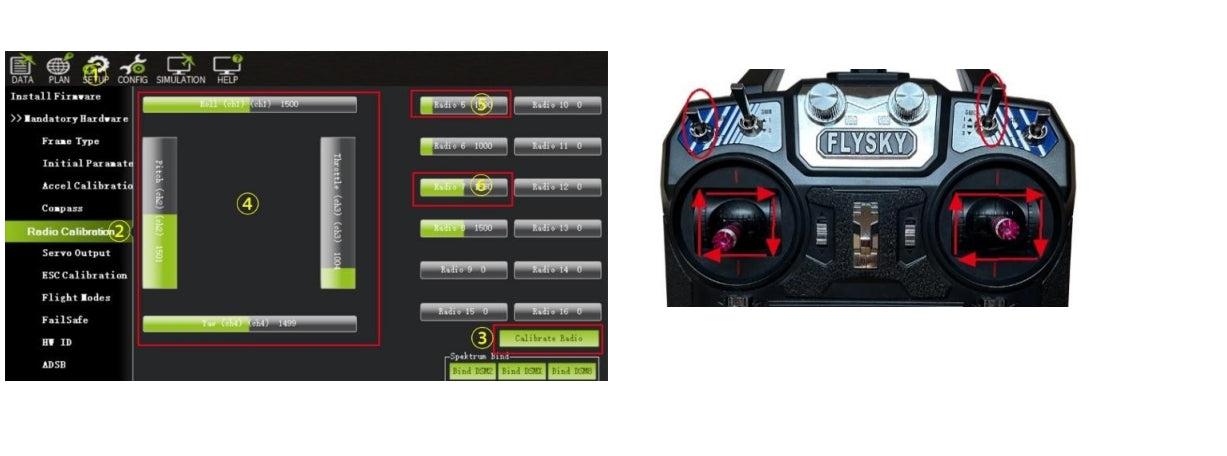
3. Use Mission Planner to connect and calibrate
Note: There are instructions of each step in Mission Planner, and please refer to videos if you need detailed operating guide.
a. Select frame type b. Calibrate accel
-
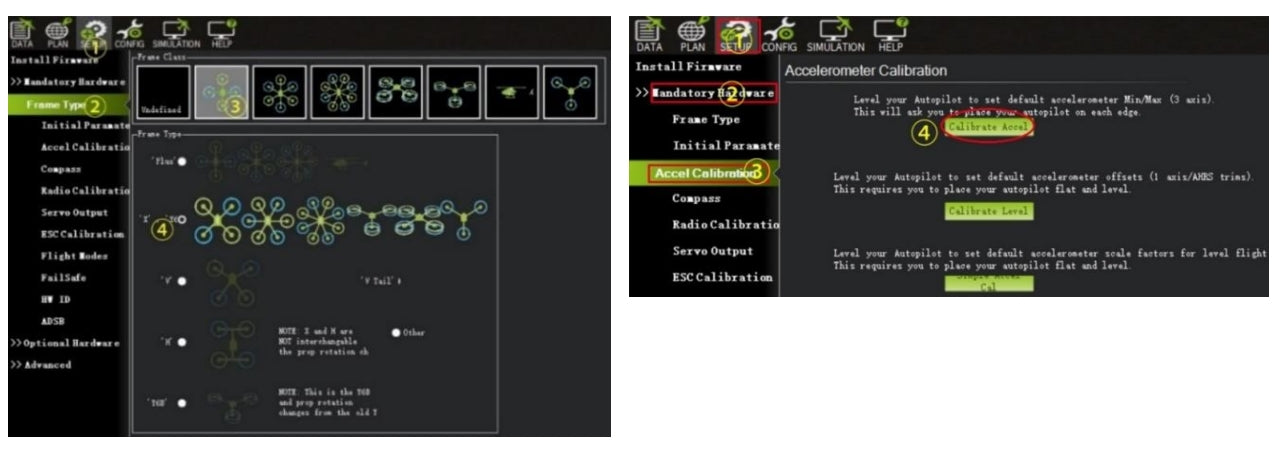
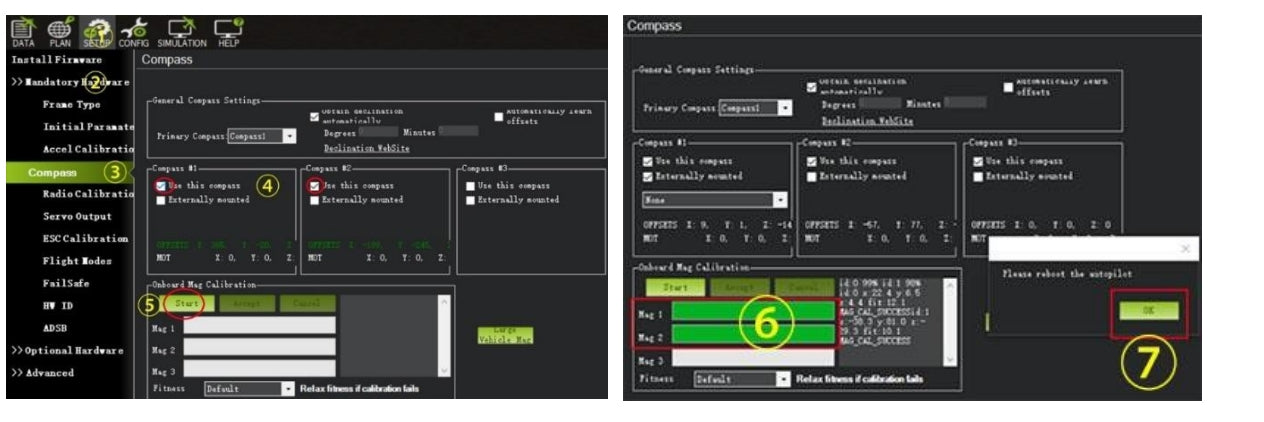
c. Calibrate compass
-
-
d. Calibrate radio
-
-
Note: Only Pitch (Ch 2) requires to be reversed.
-
e. Set flight modes
-
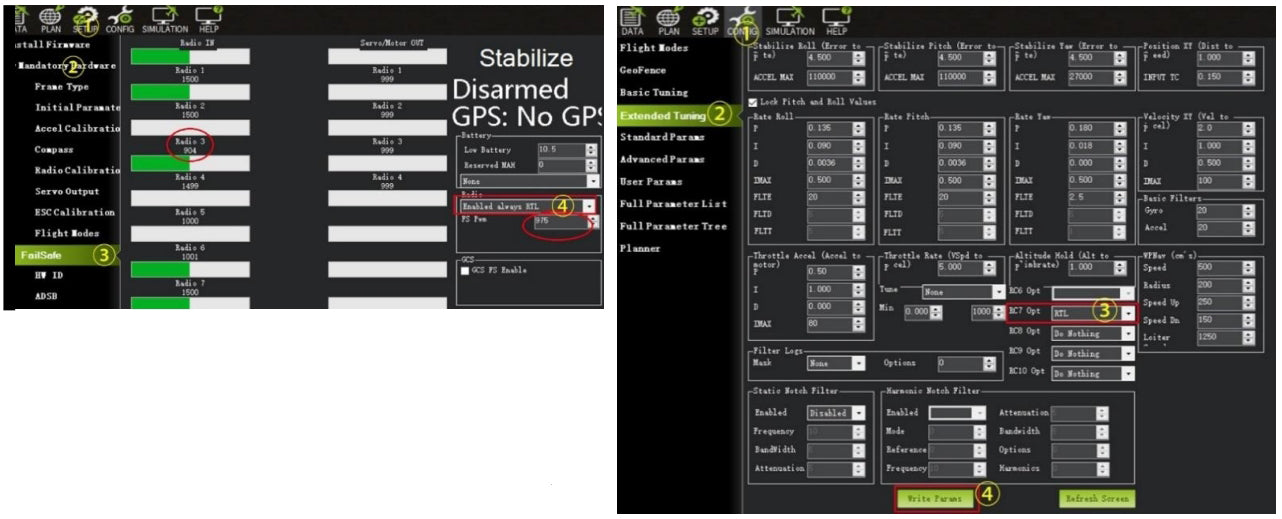
f. Set fail safe g. Set CH 7 RTL
-
Note.
Turn off transmitter to check if radio 3 value<975. It means RTL will start when signal lost. -
4. Test motors (Plug in the battery)
a. Check all the signal wires of ESC pluged into Pixhawk right.
b. Check the direction of motor rotation (#1 & 2 CCW, #3 & 4 CW)
c. If the rotation direction is not right, you should exchange any 2 of the 3 wires.
-
-
5. Calibrate ESCs (Plug and unplug the battery as follows)
a. Turn on transmitter - Push throttle to top - Plug in drone battery and wait for Pixhawk to reboot
b. Unplug battery - plug in battery and wait for Pixhawk to reboot
c. Press and hold the safety switch for 2 seconds – Motors make 1 long sound - Pull throttle to bottom – Motors make 2 short and 1 long sound (or a piece of music) - ESC calibration complete
-
-
6. Check whether the Pixhawk can arm (Plug in the battery)
Reboot the Pixhawk, turn on the safety switch and try to arm the drone. Check the status of the Pixhawk on Mission Planner, if it can’t arm, you must find out the error and solve it.
You can refer to FAQ on our website for more information.
Turn on the safety switch: Press the safety switch for 2 second and the light turns ON.
Arm the drone: hold the left joystick at the lowest right corner for about 3 seconds and the motors start to rotate.
-
Part 5 Fly the Drone
-
1. About the battery
1.1 Charge the battery
Charge the battery for about 6 hours by the USB cable. Red light means charging, green light means charging complete.
-
-
1.2 Measure the voltage
Insert left pins into the balance plug of the battery (Black wire on the left and red on the right), it makes " bee-bee" sounds. The screen display: All = total voltage, No. X = X cell voltage.
-
-
1.3 Fix the battery on aircraft
Use a double-sided tape with Velcro to secure the battery on the bottom board. Then tighten the battery with hook & loop tie.
-
-
1.4 Proper use and storage of the battery
The voltage range of the single cell is 4.2~2.5v, it should be stopped use when voltage is lower than 3.5v.
When not used for a long time, the battery should be charged or discharged to 3.8~3.9v.
-
2. Install propellers
The drone must be checked for proper condition before installing the propellers.
#1 #2 motors install silver-capped propellers, and #3 #4 motors install black-capped propellers.
-
-
Caution:
Rotating propellers can cause injury, be sure to keep them away from anyone and anything.
-
3. Start to fly
1. Turn on the transmitter
2. Plug in battery, wait for Pixhawk reboot and GPS positioning (LED light blinks green)
3. Turn on the safety switch
Press the safety switch for 2 second until it makes a sound and the light becomes ON.
4. Arm the drone
Hold the left joystick at the lowest right corner for about 3 seconds and the motors start to rotate.
-
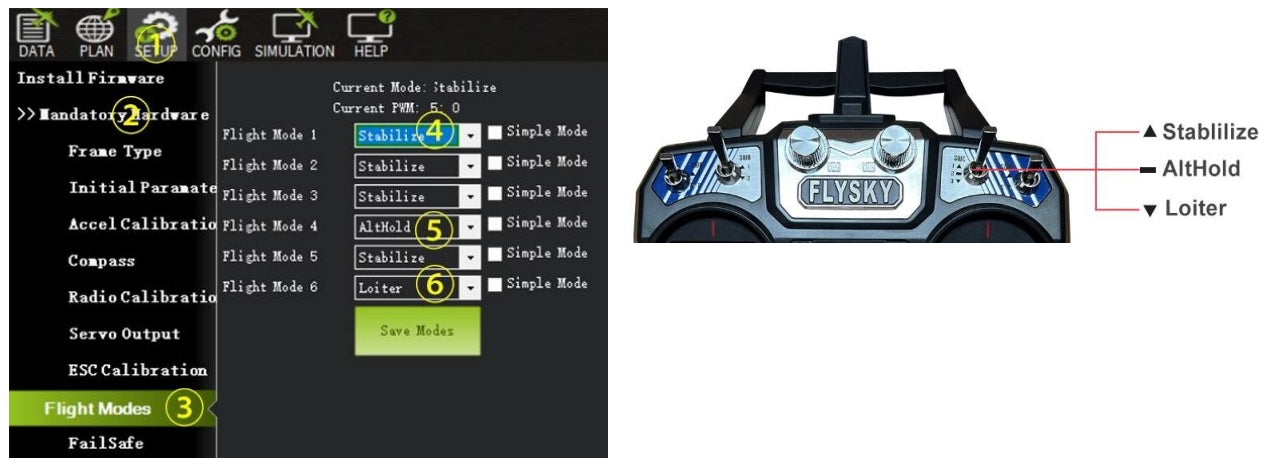
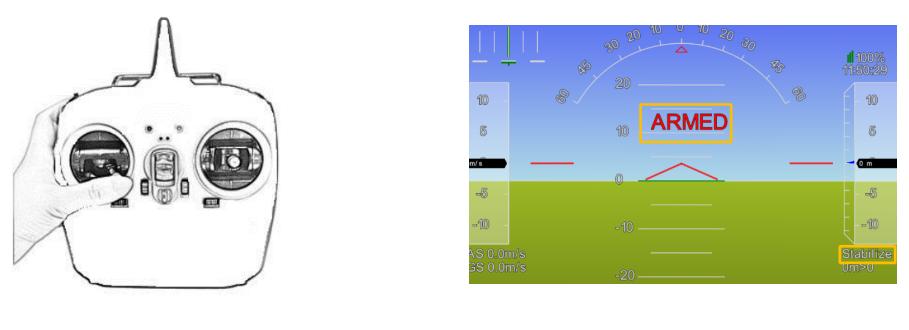
5. Switch flight modes
Use channel 5 switch to choose flight mode. We recommend newcomers use Loiter Mode, as it will help you complete a smoother flight with both GPS and barometer engaged.
-
6. Operate the drone
-
7. Land
Use joystick to drive it to land or initiate RTL via CH7 switch.
RTL can only be used when its position is accurately located in open areas.
Note: Make sure there’s no obstacle between its current position and HOME position when use RTL.
-
8. Disarm the drone, turn off safety switch and disconnect the battery
Hold the left stick at the lowest left corner for about 3 seconds to disarm the drone (motors stop spinning).
-
-
9. Turn off the transmitter
-
Part 6 After-sales Services and Others
-
1. If you need a PDF of this quick start guide or how-to video, please visit the website www.hawks-work.com/pages/f450-drone.
2. Based on questions from customers, we have compiled a list of frequently asked questions and answers, which you can view by visiting website https://www.hawks-work.com/pages/f450_questions.
3. If any part has non-human quality problems within 3 months of item arrival, you can send an email to us, we provide free replacement service.
4. DIY drones are highly customized, a safe flight is affected by the environment, weather, assembly, settings and operation. Therefore, if the drone is lost or crashed, it is not covered by warranty and compensation.
5. If you have technical or other issues, please send an email to support@hawks-work.com.
6. DIY drones mostly use open-source hardware, firmware and software, you can get more information from the following websites.
Pixhawk https://pixhawk.org
PX4 https://px4.io
Mission Planner https://ardupilot.org/planner/
ArduPilot https://ardupilot.org
DIYDrone www.diydrones.com
QGroundControl http://qgroundcontrol.com
-